Guatemala 2010 Picasa upload instructions
Picasa is a little more complicated but I think it may be easier to work with thousands of photos and videos without duplicating too much data. We will put all our pictures and videos in one gallery.
If you don’t already have Picasa, it’s a great, lightweight photo management program akin to iPhoto on the Mac. The nice thing about it is that it can work in conjunction with iPhoto if that’s what you use. It will not duplicate any files unless you choose to edit them in Picasa instead. When you first load it, it will search your computer for pictures and videos (on the Mac, it will also search through your iPhoto library). You have the option of limiting which directories/folders it searches too.
To get picasa for mac go here: http://picasa.google.com/mac/
To get picasa for PC go here: http://picasa.google.com/index.html
Once you figure out which email you will use for your Picasa account, let me know what it is so I can share the galleries with you. This is because I’m not sure if Google is smart enough to link an account you create with the email I used to invite you to picasa.
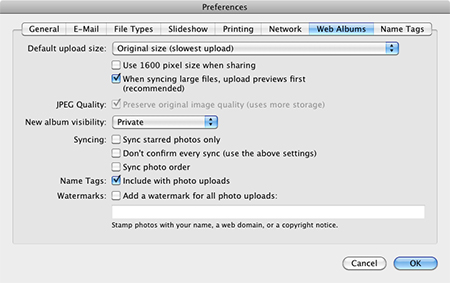
To setup picasa preferences:
- Change the default upload size to “original”
- Change new album visibility to “private”
To upload your photos/videos to Picasa online:
- Select the files you want, either manually or click the folder name on the left, and click the upload button at the bottom of the window.
- Click “Contribute to a friend’s album” and search for me (jackkan@gmail.com). This step is important to keep everything centralized.
- Look for the album I’ve set up for you and select it.
- Be sure you select “Original Size” before you upload to share the highest quality files with each other.
As an example, here is my album (you will be required to log in using a Google Account):
» Picasa: Jack’s – Guatemala, 2010
No Comments so far
Leave a comment
Log in Leave a comment


